My son, who is now almost 3, was a messy eater! And let's be honest, what kids isn't. Well I felt silly buying bibs that were just going to get destroyed. I like Bibs Like This.

I like the sleeves, and I really wanted a big pocket in front to catch stuff.
So I started by borrowing a friend's bib. Then I traced the shape onto a big sheet of painter's paper. Painter's Paper is brown, semi-thick paper that is great for pattern making.
Once I was sure I had the shape right, I cut the pieces out of a cheap, thick material I found in the remnant bin. Your pieces will look like this:
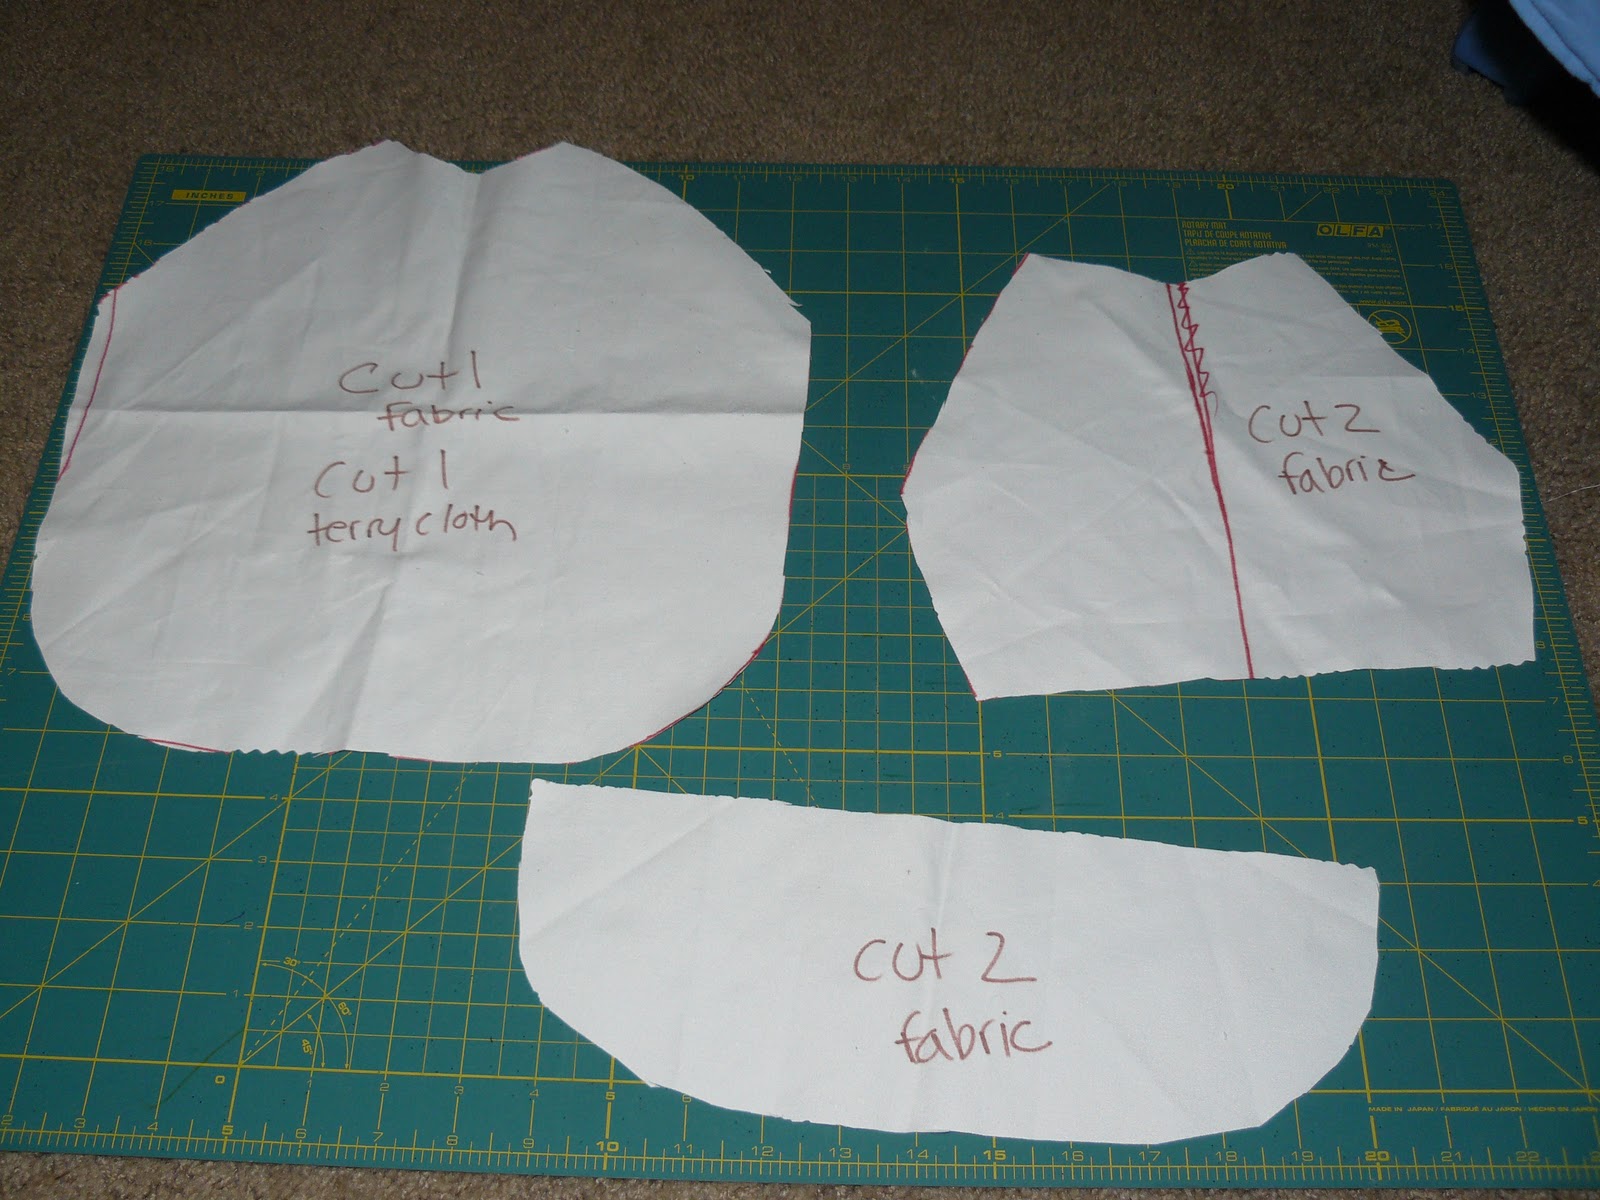
You will cut 1 fabric and 1 terry cloth of the big piece, 2 fabric pieces of the sleeve and 2 fabric pieces for the pocket.
Once you have the pieces cut, the next step is to sew the 2 fabric pocket pieces together, right sides together along the straight edge. Once sewn, open up the seam and fold the wrong sides together. I zig zag stitched along this edge to "finish" it off. You may also want to put some interfacing or stabalizer in between, but it isn't necessary.
Next you want to hem your sleeves. I simply folded over the edge twice, to hid the raw edge, and zig zag stiched along it. Note the edge of the sleeve is the straight part shown near the bottom of the screen in the image above. You can also finish the edge with seam binding or ribbon.

You next step is to attached the sleeves to the front of the bib. With right sides together, sew the sleeve to the bib at the shoulder seam.


Now this is the trickiest part. You need to sew from arm pit to arm pit WITHOUT catching the sleeves in your seam. I pin the sleeves up near the top of the neck whole to get them out of the way.
Once you sew, turn the bib to the right side. You will now have to sew the under arm part of the sleeves, and finish stitch the back part (near the shoulder blade).


Total Time: approximately 1 hour the first time, but faster every time afterwards.
Approximate Retail Value: 16.95 plus shipping
Total Savings: $11.26 (plus shipping)


I hope you enjoy! Let me know if you have any questions!
No comments:
Post a Comment